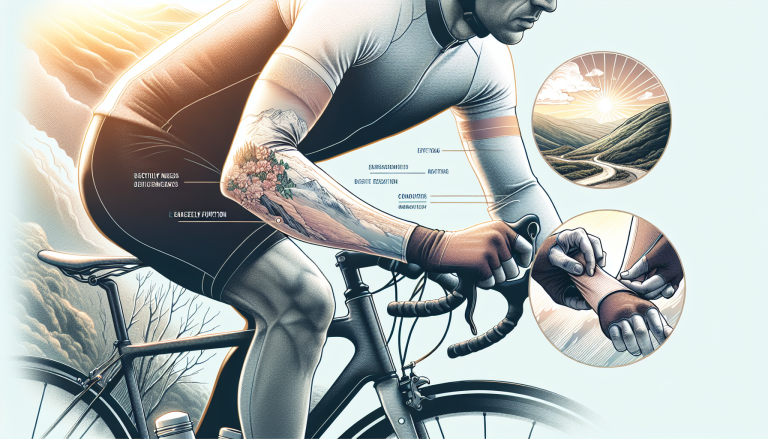
Imagine you’re cruising down a scenic bike trail, the wind whisking through your hair and the sun warming your face. Suddenly, you spot a sharp turn up ahead. Panic starts to set in as you frantically search for the best way to slow down and avoid a potential accident. Have no fear! In this article, we will guide you through the crucial steps of properly braking when cycling, ensuring that you can confidently handle any unexpected obstacle that crosses your path. So, grab your helmet and let’s get ready to pedal safely!
1. Types of Brakes
1.1 Rim Brakes
Rim brakes are one of the most common types of brakes found on bicycles. These brakes work by using friction pads that are pressed against the sides of the bicycle’s wheel rims, slowing down the rotation and ultimately stopping the bike. Rim brakes are reliable and easy to maintain, making them a popular choice for many cyclists.
1.2 Disc Brakes
Disc brakes are another popular braking system used on bicycles. Unlike rim brakes, which grip the wheel rim, disc brakes work by using a caliper to squeeze a rotor attached to the wheel hub. This mechanism provides a more powerful and consistent braking performance, especially in wet or muddy conditions. Disc brakes also require less force to operate, making them ideal for riders with weaker hands or those who prefer a lighter touch.
1.3 Coaster Brakes
Coaster brakes, also known as backpedal brakes or foot brakes, are commonly found on cruiser bikes. These brakes are engaged by pedaling backward, which activates the internal mechanism to apply friction to the rear wheel, slowing down or stopping the bike. Coaster brakes are simple to use and require minimal maintenance, making them a popular choice for casual riders or those who want a low-maintenance braking system.
2. Understanding Brake Mechanisms
2.1 Brake Levers
Brake levers are an essential component of the braking system. Located on the handlebars, brake levers allow you to control the application of braking force. When squeezed, the brake levers activate the brake mechanism and slow down the bike. It is important to ensure that your brake levers are easily accessible and that they provide a comfortable grip, as this will allow you to apply the required pressure with ease.
2.2 Brake Pads
Brake pads are the rubber or composite material that comes into contact with the wheel’s braking surface to generate friction and slow down the bike. It is essential to regularly check your brake pads for wear and tear, as worn-out brake pads can compromise the efficiency of your braking system. Replace brake pads when they become worn or when you notice a decrease in braking performance.
2.3 Brake Cables
Brake cables are the means by which the force from the brake levers is transmitted to the brake mechanism. These cables should be regularly inspected to ensure they are in good condition, free from rust or fraying. It is important to keep your brake cables well-lubricated to ensure smooth operation and prevent any unnecessary resistance or cable failure.
3. Braking Techniques for Safety
3.1 Use Both Brakes
One of the most important braking techniques is to use both brakes simultaneously. By applying equal force to both the front and rear brakes, you can achieve balanced and controlled braking. This technique distributes the braking force evenly between the wheels, preventing skidding and maintaining stability. Remember to squeeze the levers gradually and progressively to avoid abrupt stops or loss of control.
3.2 Modulate Brake Pressure
To maintain full control of your bike during braking, it is crucial to modulate the pressure you apply to the brake levers. Instead of squeezing the levers abruptly, apply the pressure gradually and adjust as needed. This technique allows for smoother deceleration and reduces the risk of the wheels locking up and skidding. Practice gentle, progressive braking to improve your overall braking skills.
3.3 Choose the Right Brake
Different braking mechanisms have their strengths and weaknesses, and it is important to choose the right brake for the given situation. For instance, rim brakes may provide sufficient stopping power for regular road cycling, while disc brakes are more suitable for demanding off-road terrain or wet conditions. Understanding the capabilities and limitations of each brake type will help you make informed decisions when it comes to braking effectively and safely.
4. Proper Hand Positioning
4.1 Holding the Handlebars
Having the correct hand positioning on the handlebars is crucial for maintaining control of your bike, especially during braking. When gripping the handlebars, ensure your hands are placed firmly and comfortably. Your thumbs should wrap around the handlebars, providing stability and allowing for precise control during braking maneuvers.
4.2 Placing Fingers on Brake Levers
To ensure quick access to the brakes, it is recommended to position your fingers on the brake levers at all times when riding. This allows for immediate response in case of any sudden obstacles or emergency situations. Keeping your index and middle fingers resting on the brake levers while maintaining a firm grip on the handlebars will enable you to react swiftly and apply the brakes effectively when needed.
5. Brake Adjustment and Maintenance
5.1 Checking Brake Pad Wear
Regularly checking the wear of your brake pads is essential to maintain optimal braking performance. Inspect the brake pads for signs of excessive wear or unevenness. If the brake pads appear worn or if the braking performance is compromised, it is time to replace them. Additionally, ensure that the brake pads are properly aligned with the wheel rims or rotor to maximize their efficiency.
5.2 Adjusting Brake Cable Tension
Over time, brake cables may become loose or stretched, affecting the responsiveness of the brakes. It is important to periodically check the tension of your brake cables and make adjustments if necessary. To adjust the tension, locate the barrel adjuster on either the brake lever or the caliper and turn it clockwise or counterclockwise to increase or decrease the tension accordingly. Always test the brakes after making adjustments to ensure they are functioning properly.
5.3 Regular Brake Inspections
Performing regular inspections of your brakes is vital for your safety on the road. Check the brake components for any signs of damage, including loose bolts, worn-out brake pads, or frayed cables. Make it a habit to inspect and clean your brakes after each ride, removing any debris or dirt that may have accumulated. Regular maintenance and inspections will help prolong the lifespan of your brakes and ensure their reliability.
6. Braking in Different Terrains and Conditions
6.1 Braking on Flat Roads
When braking on flat roads, the key is to gradually apply the brakes to reduce your speed. Use both brakes simultaneously and apply even pressure to avoid skidding. Remember to maintain a firm grip on the handlebars and keep your weight centered over the bike to maintain stability.
6.2 Braking on Descents
Braking on descents requires extra care and precision. Use both brakes to slow down and control your speed, but be cautious not to apply excessive force to the front brake, as it may cause the bike to flip over. Instead, modulate the front brake while using the rear brake to provide additional stopping power and stability.
6.3 Braking in Wet or Slippery Conditions
Braking in wet or slippery conditions requires even more caution. Be gentle with the brakes to avoid skidding or losing control. Apply the brakes gradually and give yourself extra time and distance to come to a complete stop. Be aware that it may take longer to brake in these conditions, so adjust your riding speed accordingly and leave ample space between yourself and other vehicles or cyclists.
7. Reaction and Response Time
7.1 Anticipating Obstacles
To ensure your safety, it is important to anticipate potential obstacles or hazards on the road. By scanning the road ahead and maintaining a vigilant mindset, you can proactively identify potential dangers and prepare for any necessary braking maneuvers. Anticipating obstacles allows you to react promptly and apply the brakes early, minimizing the risk of collisions.
7.2 Quick Reaction Time
Quick reaction time is crucial when it comes to emergency braking. Being able to respond swiftly to unexpected situations, such as an unexpected car door opening or a pedestrian stepping onto the road, can prevent accidents. Keep your focus on the road and always be prepared to react by using your fingers on the brake levers to initiate an immediate response when needed.
7.3 Progressive Braking
Progressive braking involves gradually applying the brakes with increasing force as needed. This technique prevents sudden stops or skidding, allowing for better control and stability. By progressively squeezing the brake levers, you can maintain balance and control over your bike while gradually coming to a stop.
8. Techniques for Emergency Braking
8.1 Squeezing the Brakes Firmly
In emergency situations, it may be necessary to apply maximum braking force to stop as quickly as possible. Squeeze the brake levers firmly, applying as much pressure as you can without losing control. Remember to distribute the braking force evenly between the front and rear brakes to prevent skidding and maintain stability.
8.2 Applying Both Brakes Simultaneously
In emergency braking situations, it is essential to use both brakes simultaneously. Applying both brakes evenly allows for maximum stopping power and helps to maintain balance and control. Be cautious not to lock the wheels by squeezing the levers too abruptly, as this can result in loss of control or skidding.
8.3 Shifting Body Weight
Shifting your body weight to the rear of the bike during emergency braking can help increase the traction on the front wheel and improve stability. Lean back slightly while keeping a firm grip on the handlebars, ensuring that your weight is well-distributed to maintain control. This technique reduces the chances of the bike flipping forward during rapid deceleration.
9. Braking on Curves and Turns
9.1 Feathering the Brakes
Feathering the brakes involves applying light pressure to the brakes intermittently to control your speed while maneuvering through curves or turns. This technique allows you to maintain control and stability without abruptly stopping. By gently dragging the brake levers or applying short bursts of pressure, you can modulate your speed and navigate turns with precision.
9.2 Braking Before the Turn
To ensure smooth and controlled turning, it is generally recommended to brake before entering a turn. By reducing your speed before reaching the curve, you can maintain stability and negotiate the turn more confidently. Apply gradual but controlled braking to slow down prior to the turn, allowing you to position your bike correctly and maintain balance throughout the maneuver.
9.3 Leaning Into the Turn
When executing a turn, it is essential to lean into the direction of the turn to maintain balance and traction. By shifting your body weight towards the inside of the turn, you can counterbalance the centrifugal force and improve stability. Remember to apply the brakes lightly or release them completely while leaning into the turn, as excessive braking can lead to loss of traction and compromise your ability to negotiate the curve effectively.
10. Communication through Braking Signals
10.1 Hand Signals
Braking signals are essential for communicating your intentions to other road users. When planning to slow down or stop, signal your intentions by extending your left arm downward at a 45-degree angle. This simple hand signal alerts those behind you that you are decelerating and helps prevent any potential collisions.
10.2 Audible Signals
In addition to hand signals, using audible signals can further enhance your communication while on the road. By using a bell, horn, or verbal warning, you can alert pedestrians, cyclists, or drivers of your presence and your intention to slow down or stop. Audible signals add an extra layer of safety and awareness to your braking maneuvers.
10.3 Flashing Brake Lights
Some bicycles are equipped with rear lights that flash when the brakes are engaged. This additional safety feature provides a clear visual indication to other road users that you are slowing down or coming to a stop. If your bike does not have this feature, consider adding a flashing LED brake light to enhance your visibility and increase awareness of your braking actions.