Maintaining your bicycle is crucial to ensure optimal performance and longevity, especially in the UK where cycling is a popular mode of transportation. From regular cleaning and lubrication to checking the tire pressure and brakes, there are several common maintenance needs that every UK cyclist should be aware of. By dedicating a little time and effort to caring for your bike, you can enjoy smoother rides, prevent breakdowns, and extend the lifespan of your trusted two-wheeler. So, let’s explore the essential maintenance requirements for bicycles in the UK and keep your ride in top shape!
Table of Contents
ToggleCleaning and Lubrication
Regular cleaning
Keeping your bicycle clean is essential for maintaining its performance and longevity. Regularly cleaning your bike not only helps to remove dirt and grime but also allows you to inspect the different components for any signs of wear or damage. To clean your bike, start by using a bucket of warm soapy water and a soft brush or sponge to gently scrub the frame, wheels, and other parts. Pay special attention to hard-to-reach areas and components such as the chain, drivetrain, and brakes. After cleaning, rinse your bike thoroughly with clean water and let it air dry or use a soft cloth to dry it off.
Chain lubrication
One of the most critical tasks in bicycle maintenance is lubricating the chain. A well-lubricated chain ensures smooth and efficient gear shifting and helps to prevent premature wear. To lubricate your chain, first, clean it thoroughly with a degreaser and a chain cleaning tool. Once the chain is clean and dry, apply a good quality bicycle chain lubricant to all the individual links while turning the pedals backward. Be careful not to over-lubricate, as excess lubricant can attract dirt and debris. After applying the lubricant, make sure to wipe off any excess with a clean cloth.
Cleaning the drivetrain
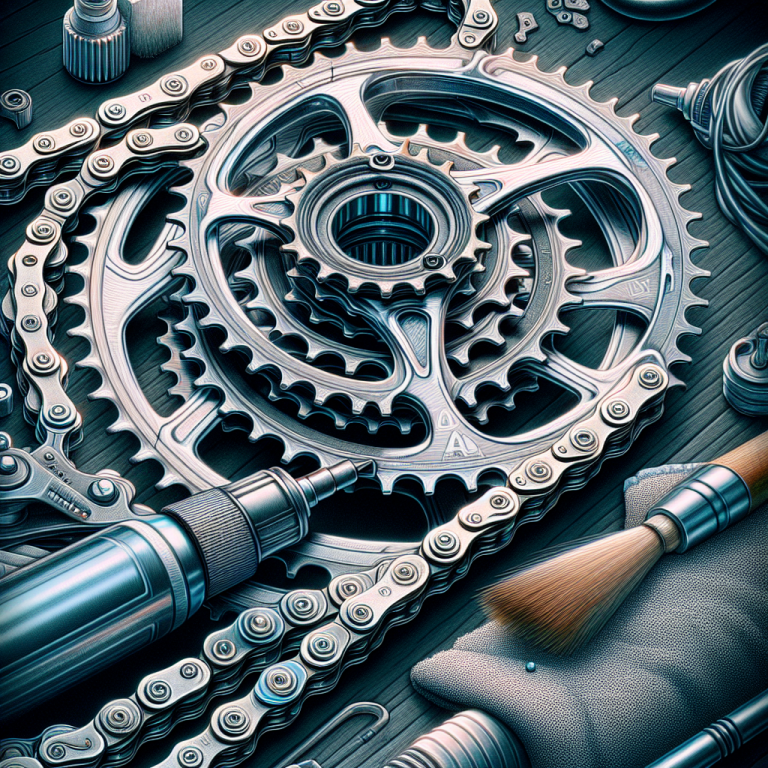
The drivetrain consists of the chain, cassette/freewheel, and chainrings, and it is particularly prone to accumulating dirt and grime. Cleaning the drivetrain regularly is essential for keeping your gears shifting smoothly and prolonging the lifespan of these components. To clean the drivetrain, use a degreaser and a brush to remove any built-up grease or dirt. Pay attention to the chainrings and cassette/freewheel teeth, as these areas tend to collect more debris. Once you have cleaned the drivetrain, rinse it thoroughly and dry it off, ensuring that all components are free from any cleaning products or water.
Cleaning the brakes
Maintaining clean brakes is crucial for your safety on the road. Over time, brake pads can accumulate dirt, road grit, and other contaminants, impairing their effectiveness. Regularly cleaning your brake pads and braking surfaces will help to ensure optimum stopping power. To clean the brakes, start by removing the wheels and inspecting the brake pads. Use a cloth or a mild solvent to wipe the brake pads and rim surfaces, removing any debris or residue. If the brake pads are excessively worn or damaged, it is advisable to replace them. Once you have cleaned the brakes, reinstall the wheels and test the braking performance before riding.
Tire Maintenance
Checking tire pressure
Maintaining proper tire pressure is essential for a comfortable, efficient, and safe ride. Low tire pressure can result in sluggish handling, increased rolling resistance, and a higher risk of pinch flats, while overinflated tires can lead to a harsh ride and reduced traction. To check your tire pressure, use a reliable pressure gauge and compare the reading to the recommended range imprinted on the sidewall of your tires. Adjust the pressure accordingly using a pump with a built-in pressure gauge until it falls within the specified range.
Inspecting the tires for wear and tear
Regularly inspecting your tires for signs of wear, damage, or punctures is crucial for your safety on the road. Look for any cuts, bulges, or excessive wear on the tread and sidewalls of your tires. Tires with worn tread patterns or visible damage should be replaced promptly to ensure optimal traction and durability. Additionally, check for embedded debris like glass shards or thorns that may cause punctures. Remove any foreign objects carefully and consider patching punctured tires promptly to prevent further damage.
Replacing worn-out tires
As your bicycle tires age, the rubber compound gradually hardens, reducing grip and increasing the risk of punctures. It is essential to replace worn-out tires promptly to ensure your safety and maintain optimal performance. Signs of worn tires include thin or bald tread patterns, visible threads, or cracks in the sidewall. While replacing tires, make sure to choose a suitable replacement that matches your riding style, terrain conditions, and tire width requirements.
Patching punctured tires
Punctured tires are a common occurrence for cyclists, and knowing how to patch them can save you time and money. To patch a punctured tire, start by locating the hole and marking its position. Deflate the tire completely and clean the area surrounding the puncture with a mild solvent or rubbing alcohol. Apply a thin layer of rubber cement to the puncture and wait for it to dry partially. Then, affix the patch firmly and press it against the tire for a minute or so. Once the patch is firmly in place, reinflate the tire and check for any slow leaks or signs of damage.
Brake Maintenance
Inspecting brake pads
Regularly inspecting your brake pads is vital for your safety while riding. Brake pads wear down over time, reducing their efficiency and increasing the braking distance. To inspect your brake pads, look for visible wear indicators or check that the pads have a minimum thickness of at least 1mm. If the pads are worn down or damaged, they should be replaced promptly to ensure reliable braking performance.
Adjusting brake cable tension
Proper brake cable tension is crucial for optimum braking performance. Over time, brake cables can stretch, affecting the responsiveness of your brakes. To adjust the brake cable tension, locate the barrel adjuster on your brake lever or the brake caliper. Turn the adjuster clockwise to increase tension or counterclockwise to decrease it. The ideal brake cable tension allows for sufficient pad clearance while ensuring quick and precise brake engagement.
Replacing worn brake pads
When your brake pads have reached their wear limit or have become damaged, replacing them is necessary. Brake pads are typically equipped with wear indicators that make it easy to identify when they need to be replaced. To replace your brake pads, start by removing the retaining pin or bolt that holds the pads in place. Slide out the old pads and insert the new ones, ensuring that they align properly with the rim or rotor. Reinstall the retaining pin or bolt, and check the brake pad alignment for optimal contact.
Bleeding hydraulic brakes
If your bicycle is equipped with hydraulic brakes, bleeding the brake system occasionally is essential for maintaining their performance. Hydraulic brakes rely on hydraulic fluid to transfer the force from the brake lever to the caliper, and over time, air bubbles can form in the system, compromising brake performance. Bleeding the brakes involves removing the air bubbles and replacing the old hydraulic fluid with fresh fluid. While it is recommended to have this procedure done by a professional, there are DIY brake bleeding kits available for experienced home mechanics.
Gear Maintenance
Inspecting gears for wear and tear
Gears play a crucial role in allowing you to shift smoothly and efficiently. Regularly inspecting your gears for wear or damage will help to ensure optimal gear shifting performance. Look for signs of worn teeth on the cassette/freewheel and chainrings. Check for excessive play or misalignment in the derailleur. If you notice any worn-out components or damaged teeth, it is recommended to replace them promptly to prevent any further issues.
Adjusting gear cable tension
Proper gear cable tension is essential for accurate gear shifting. Over time, gear cables can stretch or become loose, affecting the efficiency of your gear changes. To adjust the gear cable tension, locate the barrel adjuster on your derailleur or gear shifter. Turn the adjuster clockwise to increase tension or counterclockwise to decrease it. Adjust the cable tension until your gears shift smoothly and accurately.
Replacing worn gear components
As your bike’s gears accumulate mileage, various components may start to show signs of wear. Worn gear components can result in imprecise or unreliable shifting. If you notice that your gears are not shifting smoothly or accurately, it may be time to replace worn gear components such as the cassette/freewheel, chainrings, or jockey wheels. Regularly replacing these components when they reach their wear limits will ensure optimal gear performance.
Realigning derailleur
A misaligned derailleur can cause sluggish shifting or even result in chain skipping. To realign your derailleur, start by ensuring that your bike is in the correct gear and on a stand or upside down. Use the barrel adjuster to fine-tune the cable tension. If the derailleur hanger is bent, it may require aligning with a derailleur hanger alignment tool. Adjust the high and low limit screws to ensure proper chain alignment with the gears. Make small adjustments and test the shifting after each modification.
Chain Maintenance
Cleaning and lubricating the chain
Regular chain maintenance is crucial for ensuring smooth gear shifting and extending the lifespan of your drivetrain components. To clean your chain, use a degreaser and a chain cleaning tool to remove any built-up dirt and grime. After cleaning, make sure to rinse the chain thoroughly with water and dry it off. Once the chain is clean and dry, apply a suitable bicycle chain lubricant to all the individual links while turning the pedals backward. This will ensure that the lubricant penetrates the chain’s internal parts for optimal performance.
Checking for chain wear
Over time, your bicycle chain will naturally stretch and wear. This wear can lead to poor shifting performance, a noisy drivetrain, and increased stress on other drivetrain components. To check for chain wear, use a chain wear indicator tool or a ruler to measure the chain’s elongation. If the elongation exceeds the recommended limits, it is time to replace the chain to prevent further damage to your drivetrain.
Replacing a stretched chain
When your chain has stretched beyond its wear limit, replacing it is essential to maintain optimal gear shifting and prevent premature wear on other drivetrain components. To replace a stretched chain, start by shifting your gears to the smallest chainring and rear cog for easy chain removal. Use a chain tool to break the chain and remove the old chain from the bike. Install the new chain by threading it through the drivetrain and rejoining the chain using a quick link or a chain pin. Make sure to properly size the chain and follow the manufacturer’s instructions for installation.
Pedal and Crank Maintenance
Inspecting pedals for cracks or damage
Regularly inspecting your pedals for cracks or damage is crucial for your safety and pedaling efficiency. Pedals endure constant force and impact, making them susceptible to wear over time. Check for any signs of cracks, loose threads, or excessive play in the pedals. Damaged or worn pedals should be replaced to ensure optimum performance and prevent potential accidents.
Tightening loose pedals
Loose pedals can lead to a lack of power transfer and an uncomfortable riding experience. To tighten loose pedals, use a pedal wrench or an adjustable wrench. Stand on the side of the bike opposite the pedal you want to tighten. Turn the wrench in a clockwise direction to tighten the right pedal and counterclockwise to tighten the left pedal. Make sure the pedals are securely tightened to the crank arms and don’t forget to grease the pedal threads before installation.
Checking crankarm bolts
Crankarm bolts are responsible for securing the crankset to the bike’s bottom bracket. Regularly checking these bolts is important to prevent the crankset from becoming loose while riding. Use an appropriate torque wrench or an allen wrench to check the tightness of the crankarm bolts. If any of the bolts are loose, tighten them to the manufacturer’s recommended torque specifications.
Replacing worn-out pedals or crankarms
If your pedals or crankarms have reached the end of their lifespan or have become damaged, it is essential to replace them promptly. Worn-out pedals can lead to a lack of grip and stability on the bike, while worn crankarms can affect power transfer and torque. When replacing pedals or crankarms, ensure that you choose compatible replacements that match your bike’s specifications and riding preferences.
Wheel Maintenance
Checking wheel trueness
Regularly checking the trueness of your wheels is essential for maintaining stability and ride quality. Trueness refers to how straight and evenly tensioned the spokes are, preventing wobbling or unnecessary vibrations. To check wheel trueness, spin the wheel and observe any wobbling. Use a wheel truing stand or your bike’s frame as a reference point to assess any lateral or radial deviations. If you notice significant wobbling or uneven tensions in the spokes, it is advisable to have your wheels professionally trued.
Inspecting spokes for tension
Proper spoke tension is crucial for maintaining wheel strength and integrity. Periodically inspecting the spokes for tension will help identify any loose or broken spokes that may compromise the wheel’s performance. Use a spoke tension meter or pluck the spokes to listen for a consistent pitch and tension. If you identify any loose or broken spokes, it is recommended to have them repaired or replaced promptly to ensure the longevity and safety of your wheels.
Replacing broken or damaged spokes
Broken or damaged spokes can significantly impact wheel stability and strength. If you notice any broken, bent, or severely damaged spokes, it is necessary to replace them promptly. Replacing spokes involves removing the tire, tube, and rim tape to access the damaged spoke. Use a spoke wrench to remove the broken spoke and thread in the new spoke, ensuring proper alignment with the hub and nipple. Reinstall the rim tape, tube, and tire, and check the wheel’s overall trueness and tension.
Wheel bearing maintenance
Wheel bearings allow your wheels to spin smoothly and efficiently. Regular maintenance of wheel bearings is crucial for reducing friction and wear. To maintain your wheel bearings, start by removing the wheels from the bike. Depending on the type of hub, you may need to remove the axle nuts, quick-release skewers, or end caps to access the bearings. Clean the bearings, inspect them for any signs of wear or damage, and replace them if necessary. Apply a suitable bearing grease or lubricant before reinstalling the bearings and reassembling the wheels.
Saddle and Seatpost Maintenance
Cleaning and lubricating the seatpost
Keeping your seatpost clean and properly lubricated is essential for smooth height adjustments and preventing it from getting stuck in the frame. To clean and lubricate the seatpost, first, remove it from the frame by loosening the seatpost clamp or quick-release mechanism. Wipe off any dirt or grime from the seatpost using a damp cloth. Apply a thin layer of carbon fiber assembly paste or grease to the part of the seatpost that inserts into the frame. Reinstall the seatpost in the frame, making sure it is set at the correct height, and tighten the clamp or quick-release mechanism securely.
Checking saddle height and angle
Proper saddle height and angle are crucial for comfort, power transfer, and injury prevention. Regularly checking the saddle height and angle will help ensure optimal riding position and pedaling efficiency. To check the saddle height, place your heel on the pedal at its furthest point from the saddle. Adjust the saddle height so that your leg is fully extended with a slight bend in the knee. To check the saddle angle, sit on the bike and adjust the tilt of the saddle until you find a comfortable position that supports your sit bones and minimizes pressure on sensitive areas.
Replacing worn-out saddle or seatpost
Saddles and seatposts can experience wear and tear over time, affecting your comfort and riding experience. If you notice signs of excessive wear, damage, or discomfort, it may be time to replace your saddle or seatpost. When choosing a new saddle or seatpost, consider factors such as riding style, terrain, body dimensions, and personal preference. Make sure to select a saddle with the appropriate width, shape, and padding that suits your riding needs. Additionally, choose a seatpost that matches your frame’s seat tube diameter and offers the desired adjustability features.
Handlebar and Stem Maintenance
Checking handlebar and stem alignment
Regularly checking the alignment of your handlebar and stem is important for your comfort and control while riding. Misaligned handlebars or a loose stem can lead to poor handling, reduced steering precision, and increased risk of accidents. To check the alignment, stand in front of the bike and ensure that the handlebar is centered and level. Look for any noticeable gaps or misalignments between the handlebar and the stem. If you identify any misalignments or gaps, loosen the stem bolts and make the necessary adjustments. Once aligned, retighten the stem bolts to the recommended torque specifications.
Tightening loose bolts
Loose bolts on your handlebar or stem can compromise your safety and riding experience. Regularly check and tighten the bolts on your handlebar and stem to prevent them from coming loose during rides. Use an appropriate torque wrench or allen wrench to tighten the bolts to the manufacturer’s recommended torque specifications. Avoid overtightening the bolts, as this can damage the components or stress the handlebar and stem.
Replacing worn-out handlebars or stems
If your handlebars or stem have become worn, damaged, or no longer provide the desired fit or riding position, it may be time to replace them. When choosing new handlebars or stems, consider factors such as material, width, rise, reach, and drop that suit your riding style, body dimensions, and personal preference. It is advisable to consult with a professional bike fitter or your local bike shop to ensure that the new components are compatible with your bike and provide the desired fit.
Frame Maintenance
Checking for cracks or damage
Regularly inspecting your bike frame for cracks or damage is essential for your safety and the longevity of your bicycle. Cracks or structural damage can compromise the frame’s integrity and potentially lead to catastrophic failures. Thoroughly inspect the frame for any visible cracks, dents, or signs of damage, paying particular attention to high-stress areas such as the joints, bottom bracket, and headset. If you notice any cracks or significant damage, it is recommended to consult a professional bike mechanic or contact the manufacturer for guidance on repair or replacement options.
Cleaning and protecting the frame
Cleaning and protecting your bike frame is not only a cosmetic consideration but also a way to guard against corrosion and preserve the frame’s finish. Regularly clean your frame using a mild soapy solution and a soft brush or sponge. Pay attention to hard-to-reach areas and joints. After cleaning, rinse the frame thoroughly with clean water and dry it off with a soft cloth. To protect the frame from corrosion and enhance its appearance, consider applying a wax or bicycle-specific frame protection product according to the manufacturer’s instructions.
Touching up paint chips
Paint chips are inevitable over time, and while they may not affect the frame’s structural integrity, they can be unsightly and potentially lead to corrosion. To touch up paint chips, start by cleaning the affected area thoroughly and allowing it to dry. Use an appropriate touch-up paint or nail polish that matches your bike’s frame color. Carefully apply the touch-up paint to the chipped area, building up thin layers until it matches the surrounding paint finish. Allow the paint to dry completely before riding.
Frame alignment checks
A misaligned frame can cause handling issues and affect the overall performance of your bike. While frame misalignment is less common, periodic checks can identify any potential issues. Professional bike shops have specialized tools and expertise to perform comprehensive frame alignment checks. If you suspect any misalignment or experience handling problems, it is recommended to consult a professional bike mechanic for an accurate diagnosis and any necessary adjustments or repairs.
Taking care of your bicycle is essential for enjoying a safe and pleasant riding experience. Regular maintenance, cleaning, and lubrication will not only extend the lifespan of your bike but also ensure optimal performance and reliability. By following these maintenance needs, you can keep your bicycle in top shape and enjoy many trouble-free rides across the beautiful landscapes of the UK. Happy cycling!


